


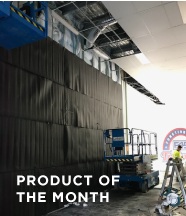
The Sound-Stop 5 (SS5) is such a popular product that we had to create a blog post just for it. It is no surprise that our customers love it—this is an easy to install Polymer that can significantly reduce unwanted noise in your home, media room, cinema and ceilings.
We haven’t quite seen a soundproofing solution as versatile as the SS5. You can pair it with other acoustic-insulators to increase their efficiency immediately. It is a much more cost-effective (and way better) alternative than many layers of plasterboard.
In this article, we will be covering
- What is the ideal usage?
- How hard is the installation?
- Preparing SS5 for installation.
- Things to note before you begin.
- Wall installation notes.
- Installation tips for different parts of the room.
WHAT IS THE IDEAL USAGE?
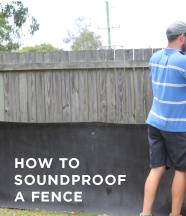
Sound-Stop 5 is typically most useful in areas where a wall or ceiling cannot be constructed with many layers of plasterboard. Other applications include covers for doors, windows, and other openings, as well as around pipes, duct, automobiles and hanging from exterior fences.
If you are feeling extra creative, you can also use SS5 to create your own little soundproofing solution. We did say it’s a DIY-friendly product, didn’t we?
For example, look at Steve—the man behind Soundproof Warehouse do it in the video below. His custom-made ‘Noise Killer’ reduces up to 90dB of noise. He has created it by using two-layers of SS-5 and combining them with some insulation, plywood, and carpet patch. Strategic usage of 2mm airgaps certainly helps him achieve this outcome.
HOW HARD IS THE INSTALLATION?
You don’t need any special skills to install Sound-Stop 5. The most important detail is in the sealing process. Ensure that there are no air gaps.
PREPARING SS5 FOR INSTALLATION.
SS5 is very heavy, so it is ideal for at least two people to handle it together. In this installation guide, we are focusing on preparing SS5 for usage on walls, floors, or ceilings. Ensure that the product clean and dry before you begin.
To prepare Sound-Stop 5 for installation:
- Unroll and square the ends
Square the ends with a T-Square and then use a Stanley Knife to cut SS5. This will help in achieving a tight finish with fewer gaps while sealing the joins. - Roll out in the opposite direction
Rolling and then unrolling in the opposite direction will help avoid a curled-up sheet of SS5. This is not necessary but it makes the handling much easier.
THINGS TO NOTE BEFORE YOU BEGIN.
- Services on the wall
By services we mean wall sockets, switches and things like that. Measure the size of all these openings and mark their locations with chalk. Do this as you lay the flattened roll of SS5 on the floor.
This helps ensure that no important service/opening is missed. You can simply cut out these openings with a Stanley Knife using the chalk-markings immediately after fixing each roll of SS5 to the wall. - No air gaps
Sound-Stop 5 needs to be as airtight as possible during installation. If air can pass through, so can sound. Sealing is a critical step for efficient SS5 installation. Seal all perimeter edges, joins, electrical boxes, access points and the edges at window and door openings. This can be done using Super Grip tape and Fuller Fire Sound acoustical sealant. - Windows
Windows can be the weakest link in the wall system. Consider using an add-on secondary glazing system which will significantly reduce noise coming through the window. If you soundproof a wall with SS5 perfectly but forget about the window, you’ve left the job (very) incomplete. - The noisy side
Wherever possible, Sound-Stop 5 should be installed on the noisy side of the wall assembly. Soundproofing is best contained when SS5 is closest to the source. This minimises sound energy that can be converted into mechanical noise.
WALL INSTALLATION NOTES.
Since SS5 is most commonly used on walls, we have created this section to make the process easier. The notes go beyond simply installing the SS5—covering other factors like insulation and resilient channels that add to its efficiency. Here are some things to keep in mind when you are working on walls:
- Butt-joint or overlapYou can butt join or overlap the SS5 seams. Butt-joining simply means pushing two materials together without overlapping them. You can do this by applying Fuller Fire Sound on the join and taping it with Super Grip Tape.If you overlap, there will be a 3mm rise in the plasterboard. Fortunately, you don’t need fasteners (screws/staples) on the overlap. Overlap at least 40mm to assure adequate sealing and apply Fuller Fire Sound Sealant within the overlap.Both methods require you to seal the seams with Super Grip Tape and Fuller Fire Sound Sealant.
- Exterior/Outside perimeter wallWhen installing on the outside perimeter wall vapour flow is required. This simply means allowing moisture to seep out of the cavity. A small amount of air penetrating the cavity avoids moisture build-up which would otherwise rot the wooden studs.Overlap the seams to provide vapour flow (70mm would be fine). Do not tape the seam or apply acoustic sealant.No fasteners are required on this overlap because the screws will hold SS5 above and below the seam once the exterior cladding is installed.
- The plasterboard edges
When the plasterboard is installed the edges should not touch. Leave a 3-4mm gap around the entire perimeter wall and use Fuller Fire Sound in the gaps. This will help decouple the surfaces and minimise the mechanical transmission of sound. Finish the plasterboard as normal. - Using with resilient channels
When using resilient channels, attach the channels at 600mm centres if you are using a 16mm plasterboard.Use screws long enough to attach the plasterboard to the resilient channel and not penetrate the material. - Using with insulation
Always use a high-density insulation in the cavity. We recommend using insulation that is at least 32Kg per cubic meter.On the top end, you could use Fibertex 650 insulation. This is a heavy and dense Rockwool insulation ideal for retrofit systems and when noise needs to be controlled aggressively. - Final inspections
Inspect the final install and check for any gaps. You may need to add some acoustical sealant in places you have missed. After you are happy with the installation, you can proceed with the installation of the plasterboard.Keep pan head screws/wafer head screws or staples as flush as possible. Ideally, we recommend a 16mm fyrcheck plasterboard when possible.
INSTALLATION TIPS FOR DIFFERENT PARTS OF THE ROOM.
Wood Stud Wall Installation
- Use Cap Staplers
A Cap Stapler is the easiest and fastest tool for installing SS5. We recommend using Bostitch® Cap Staplers. - Bottom-Up
Start installing SS5 from the bottom corner of the wall. - Four Fasteners
Fasten around 4 fasteners (screws or staples) per stud. - Let It Flex
Leave a couple of millimetres between each stud so it can flex in the wall—When the sound waves hit the material, it will flex in the wall and dissipate the sound energy into heat. - Second Layer
Overlap the second layer for around 40mm using the acoustical sealant and tape seam.
Wood Floor Joist Installation
- Sandwich the SS5
Sound-Stop 5 is most effective when it is applied over the top of the wood joists before the subfloor is installed. - Attach to Joist
Use fuller Tool Box Adhesive to attach Sound-Stop 5 to the joist. Try using a couple of staples to tack the Sound-Stop 5 to the joist. This will help to hold the material in place until the adhesive goes off. - Butt-join or Overlap
You can butt-join or overlap the material, but ensure that you cut back on the joist to avoid a rise. The subfloor will then install flat. - Make it Airtight
Seal all seams and joins with acoustical sealant and tape with Super Grip tape. To put it simply, air-tightness is the aim. - Avoid Screws
Use Fuller Tool Box adhesive to install the subfloor. You may acoustically short circuit the system if you use nails or screws on the floor. Use as few screws as possible. - Decouple to Avoid Flanking
Always try to decouple walls from subfloors. Fill the gaps with acoustical sealant. This will help in reducing sound flanking paths.
Flanking paths refer to when the sound passes around, over the top or under the primary partition separating two spaces. In other words, noise that take any path other than the direct path.
Ceiling Installation
- More the Merrier
Sound-Stop 5 Isolation Material is 5Kg per sq meter. This is why it is recommended that a 2 – 3 persons be used for installation. - Seal All Penetrations
Any penetrations for lighting, etc must be sealed around the edges with Acoustical Sound Sealant and Super Grip Tape. - Add Insulant
Fibertex Rockwool is an excellent insulant that can therefore be used to upgrade the acoustic assembly of the ceiling.
Ceiling Wood Joist
- Try a Plasterboard Lifter
When installing Sound-Stop 5 overhead, it is necessary to support the material in place for fastening. Many installers use a Plasterboard Lifter to lift the material in place. This allows you to push the material into position with your hand and then staple it onto the joist. - Use Resilient Channels
Resilient Channels can be placed on top of the Sound-Stop 5 to decouple the plasterboard ceiling to avoid the transmission of mechanical noise. When using a Resilient Channel system, screws should only be long enough to penetrate the plasterboard and frame, but not the Sound-Stop 5. - Keep a Gap
Keep a gap of 3 – 4mm at all perimeter joins between the wall and ceiling and fill with Fuller Fire Sound. This will reduce flanking sound coming down the walls.
We hope that this was enough information to help you DIY like a professional. To sum it up, the versatility of Sound Stop 5 makes it a customer favourite and we hope that it works for you too. If you end up getting creative with your soundproofing solution using SS5, don’t forget to share it with us on info@soundproofwarehouse.com.au. If we love your creativity, we might just share it on our website.
Any questions? Feel free to contact Steve on 07 3287 7647 7 days a week from 9 AM to 5 PM. You can also contact us on 0431 576 667 outside office hours.
