


From noisy neighbours to heavy traffic and construction, there’s plenty of noise that we’d rather keep outside our property boundaries. Unfortunately, while fences are great at keeping people and animals out of our yards, they aren’t that great at blocking noise. Do you know how to soundproof a fence?
That’s where an Acoustic Fence Wrap (AFW) can help. These retrofit solutions allow you to cost-effectively add a noise barrier to your property boundary, providing up to 70% noise reduction.
Timber fences tend to crack and shrink over time. At some point, they will become acoustically transparent. The AFW will not shrink over time so you can be assured that it will last you years.
Since you simply attach it to your existing fence, there is minimal installation required. This means that installation is quick and easy without the need to hire contractors.
As an acoustic barrier, the wrap should be set up in a way that it completely blocks the line of sight to the noise source. If you can still see the noise source, you’ll need to extend the barrier in the appropriate direction.
Choosing the right acoustic fence wrap
When selecting an acoustic fence wrap, there are a few key factors to consider:
1. Is it sun-proof?
Your fence wrap should be UV stable, suitable for outdoor use in your environment. Here in Australia, this is a key component as our harsh sun can quickly deteriorate an inferior product. That could leave you with gaps in your barrier and up for replacement costs.
2. Is it water-resistant?
Keeping with the outdoor theme, water resistance is also an important factor. Not only should it be able to withstand the occasional downpour but also being able to wash the wrap will keep it looking good for longer.
3. Is it paintable?
Talking about looking good, you should also consider whether the material can be painted. Many acoustic fence wraps come in the standard black, but if you want your fence to look more like a fence, then being able to drop a fresh coat of paint on the wrap can make a world of difference.
Common myths surrounding yard soundproofing
1. Trees can block noise.
While this would be the ideal scenario for us all, unfortunately, trees do little to block noise. The gaps between trees and bushes will allow sound to pass straight through.
2. High-quality steel fences can block sound.
There are some incredibly durable fences like Colorbond in the market. These products, however, do not claim to block noise. They allow a lot of external sounds to transmit through the material and reflect internal noise sources, which can lead to reverberation.
The good news is that this is an ideal situation to install the AFW on top of the Colorbond fence. The fence wrap will dampen the vibrations of the metal. This means that your fence will be both durable and soundproof.
3. You can use white noise instead.
Some blogs recommend white noise machines and fountains to mask the outside noise. While not completely false, this solution is not an alternative for soundproofing. The effect only lasts as long as the machine is turned on. Some research also shows that parents should be cautious about decibel levels when using these machines around babies. If countering traffic noise with noise suits you, however, we aren’t going to stop you.
Before installing your acoustic fence wrap
Once you’ve chosen your acoustic fence, the next step is to install it. Before you start, however, reading the following tips can ease your workload by a mile.
1. Straighten it out
Most, if not all, fence wraps come in rolls. It can be very beneficial to unroll your wrap and leave it in the sun for a couple of hours so that it straightens out before installation. This will allow it to hang straight during installation and avoid bunching.
2. Chalk-line the wrap
Another useful tip is to use chalk and mark where the screws and washers are to be fixed. This will ensure an even weight distribution across all attachment points, maximising the life of your wrap. You can either chalk-line all the rows beforehand or do it one row at a time.
3. The 50mm rule
Whether you choose to chalk-line or not, it is important to know this rule. Always keep a distance of at least 50mm from the edges when you screw. If you screw too close to the edges, the wrap may tear.
Installation steps
We recommend reading the manufacturer’s guidelines, but in most cases, this is as simple as cable-tying the wrap to the fence railings. To make things easier, we will tell you how we do things at Soundproof Warehouse. Please keep in mind that the product used is our own Acoustic Fence Wrap.
You will need: At least two people, a screw gun, one-inch washers, timber screws, a Stanley knife, a straight edge.
Assumptions:
- The fence is 6 feet tall for the following steps. We will use two rows of the wrap (top and bottom).
- You have already straightened out the wrap.
- You will chalk-line the wraps one row at a time. The illustrations do not show the chalk-lines.
Begin!
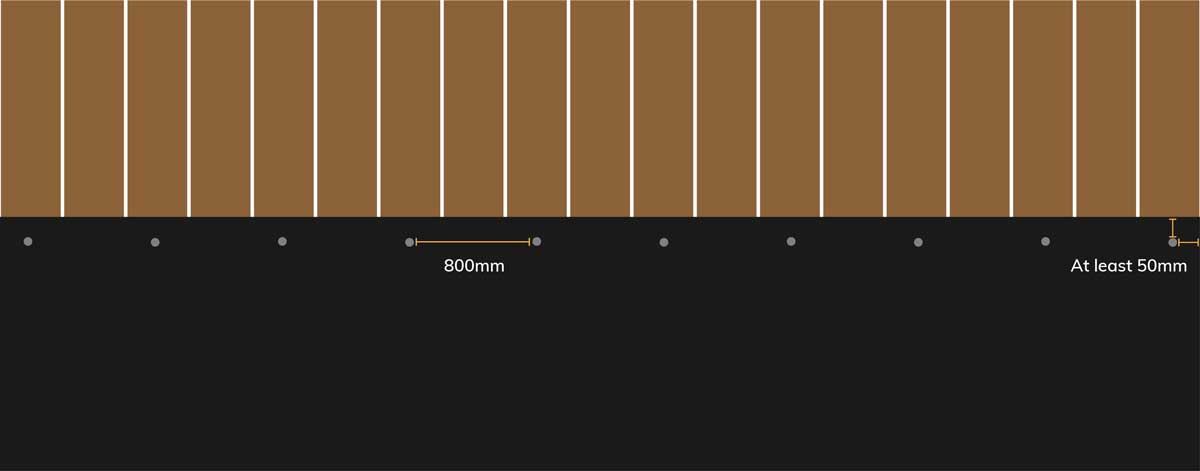
1. Chalk-line the first (bottom) roll every 800mm
Since installation starts from the bottom row, we will chalk line every 800mm towards the top of the bottom row. This marking makes screwing much easier. Don’t forget about the 50mm rule while you’re at it.
2. Roll the wrap again
Now that the wrap has been chalk-lined and straightened out, you need to roll the wrap again for immediate installation.
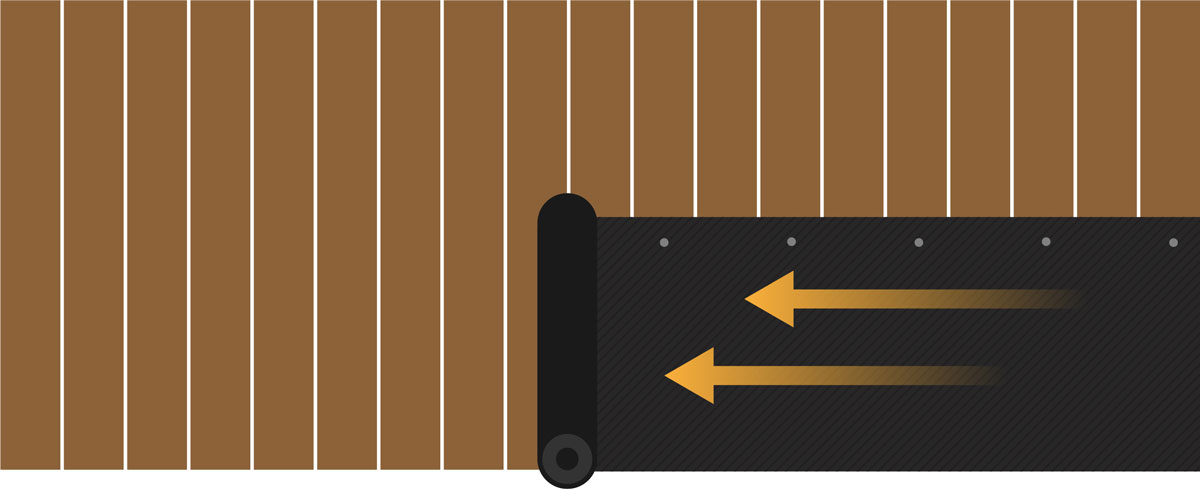
3. Unroll bottom row as you keep the roll vertical
While keeping the roll vertical, i.e. one side of the roll is touching the ground—unroll it. Ensure that there is no gap between the wrap and the ground. This is essential so that no noise can flank under the barrier. Naturally, it is always best to start from the bottom of the fence.
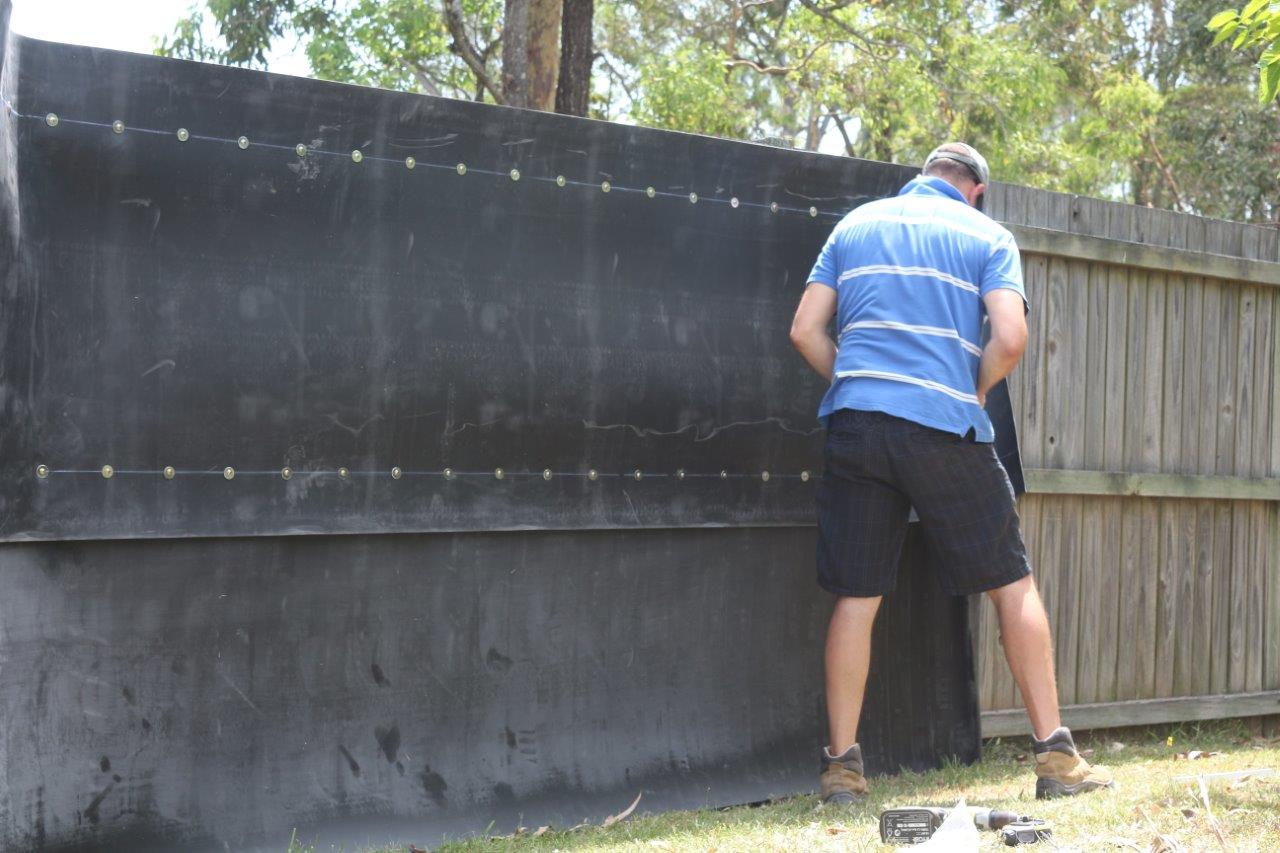
4. Screw every 800mm towards the top of the bottom row
As you slowly unroll, screw the Acoustic Fence Wrap to the fence at every 800mm.
This step will ensure the complete fixation of the bottom row to the fence. We are only screwing the top section of the bottom row at this point.
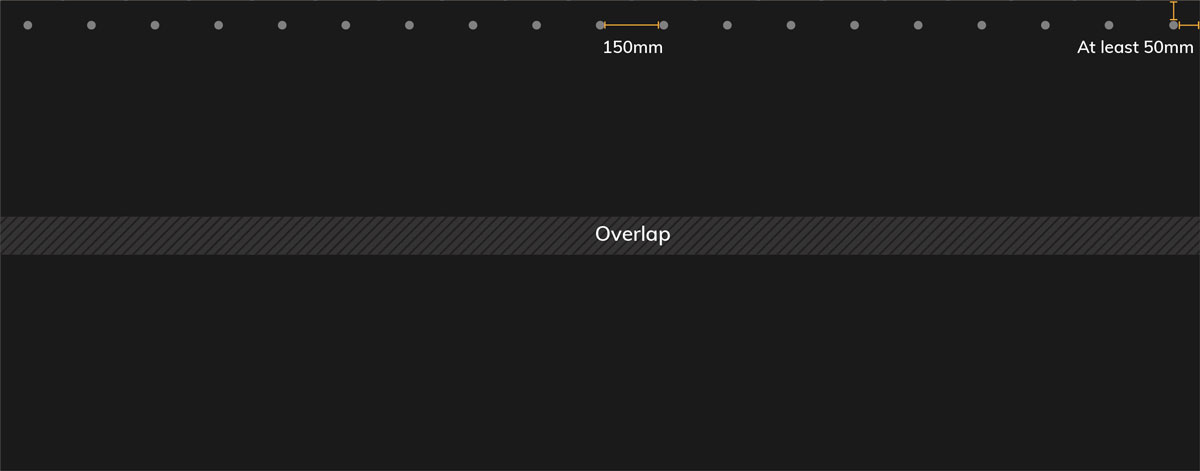
5. Chalk-line the second (top) roll every 150mm
Grab the next roll of AFW. Since the top row isn’t going to be touching the ground, it needs better weight distribution. This is why we will chalk line every 150mm instead of 800mm here. Ensure that you leave a gap of at least 50mm from the edges (top and sides). Roll the wrap up again when finished.
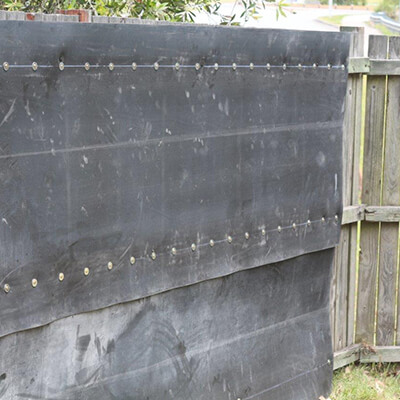
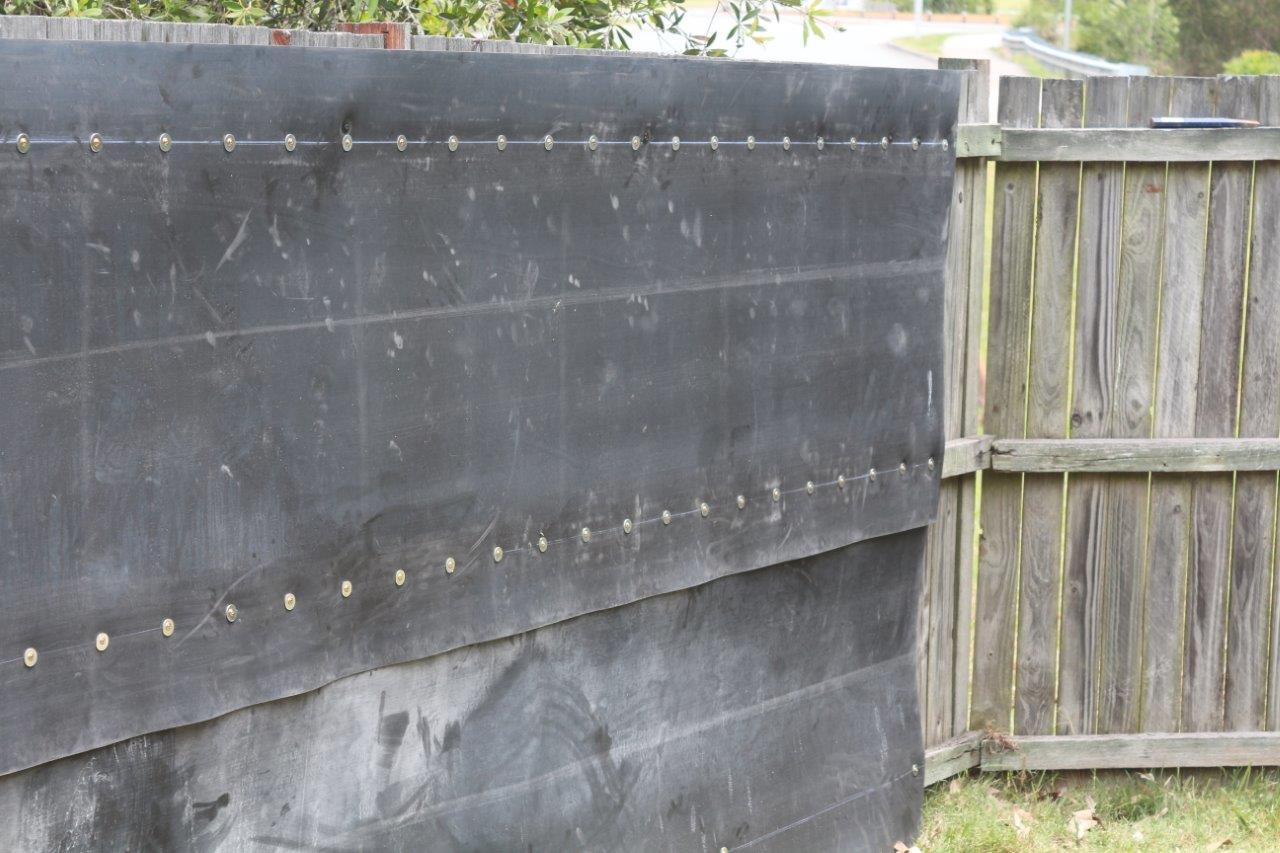
6. Overlap the top and bottom row
You will need another person to help you out since the roll weighs about 50kg.
Start slowly unrolling the wrap while ensuring that this new top row overlaps the bottom row.
7. Screw every 150mm towards the top of the top row
As you slowly unroll, keep screwing every 150mm (along with the chalk-line markings). Once you reach the end of the fence, you would have secured the top row to the fence.
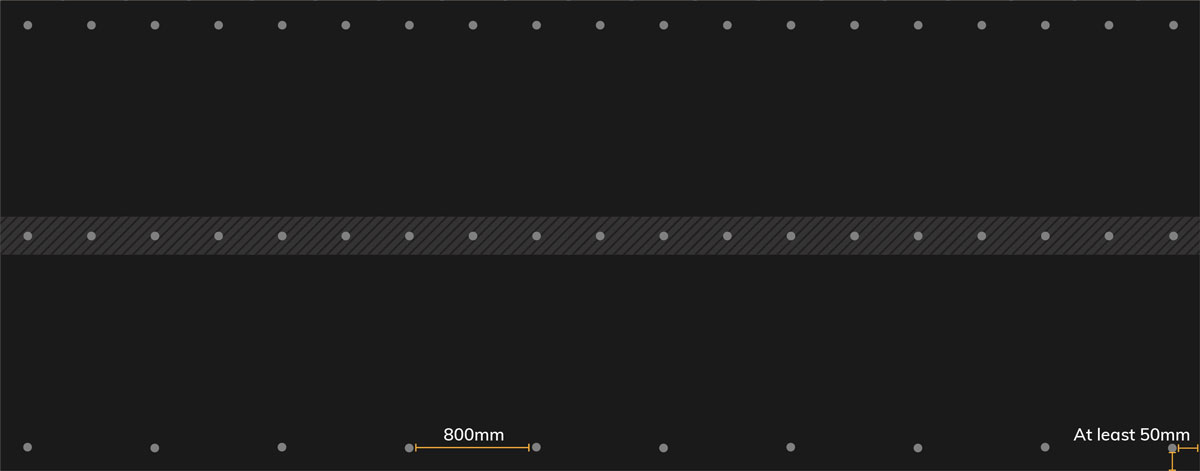
8. Screw the overlap every 150mm
Keeping the same minimum distance of 50mm from the edges, screw the overlap at every 150mm. You may or may not chalk-line for convenience. Ensure that the screws are penetrating both the top row and the bottom row of the Acoustic Fence Wrap.

9. Screw every 800mm towards the bottom of the bottom row
To disallow air from travelling under the fence, we need to screw the bottom of the bottom row. Do this every 800mm keeping in mind the 50mm-gap-rule.
10. Add soil/earth at the bottom
The importance of leaving no gaps cannot be disputed. The wrap should extend all the way to the ground and make solid contact. If this doesn’t happen, the noise you’re trying to stop will simply come through underneath.
To ensure this solid contact, you can add some extra earth at the bottom of the fence.
With that final step, your Acoustic Fence Wrap should be fixed for years to come. If it’s too dark and edgy for your taste, you can always paint it or install lattice panels on top for a more appealing look.
This water, UV, and mould resistant product will remove the unnecessary hassle of fence upkeep. Notice up to 70% noise reduction as you relax in your oasis of peace.
Stuck at some step? You’re not alone. We understand that this can be a complicated endeavour. You can give us a call on 07 3287 7647 for some quick answers.
Haven’t bought your Acoustic Fence Wrap yet? We commend your curiosity for reading (or scrolling) till the end of this article. If you would like to find out more about the AFW or any other soundproofing material, get in touch with us at info@soundproofwarehouse.com.au.
